New Gas Fittings LCC27

New LPG Gas Bottle Fittings have arrived

Here's what you need to know.

The New LCC27 LPG Gas Cylinder Fittings for Australia

Here’s a quick video from Platinum Campers explaining everything you need to know about the new gas fittings. 

LCC27 fittings have improved safety features

LPG cylinders will be coming out soon with a new fitting called a LCC27. There’s a good chance that your current gas bottles use a Type 21 or POL connection.

LCC27 fittings offer improved safety features, including an easy-to-use right-hand threaded external ACME connection, and a back check valve that must be engaged before gas can flow. In addition, there is a thermal cut-out on the LCC27 appliance connection.

LCC27 Connector LPG Gas Fitting Drawing
LCC27 Connector LPG Gas Fitting
POL Connector LPG Gas Fitting Drawing
POL Connector LPG Gas Fitting

What you Need to know about the new Gas Fittings

Do I need an Adaptor?

The new gas regulations state that you cannot use an adaptor with the new LCC27 gas fittings. However – the new bottles are backwards compatible to appliances with POL connections – so you won’t need an adaptor anyway. You will not need to change anything to use the new gas bottles with your current appliances (Your BBQ will still work!) 

However – New appliances, like camper trailers from now will have the new LCC27 gas connection. And these are not backwards compatible with your old gas bottles. So, if purchasing a gas appliances (including camper trailers) from now, you will need to get the new bottle. 

POL connection phasing out

Over the next 10 years, the LCC27 will take over from the POL Connection across the board. Leisure gas cylinders have a 10 year test cycle, so by 2031 – you will find the LCC27 is the main bottle in use. 

Still safe to use?

Yes, your current gas appliances with a POL connection are still safe and reliable for use, and will still plug into the new bottles. So on your next swap – look out for the new bottle and get yourself future proofed! 

LCC27 valve to LCC27 appliance
LECC27 Valve to POL appliance
Pol Valve to Pol Appliance
Pol Valve to LCC27 appliance
Bringing your camper out of storage

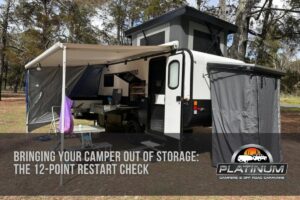
Bringing Your Camper Out of Storage: The 12-Point Restart Check

To bring your camper out of storage safely, complete a full restart inspection before you hitch up: check structure, tyres, brakes, hitch, lights, battery, water, gas, canvas, interior systems, undercarriage, then do a short road test. Skipping this step is one of the fastest ways to turn the first trip of the season into a breakdown or a failed safety check. Australian conditions are hard on stored gear. Heat, humidity, dust, rodents, UV and long periods of sitting still all take a toll on seals, canvas, electrics and wheel ends. Whether your unit is a soft floor, rear fold, forward fold, double fold or hybrid, a structured bringing your camper out of storage checklist gets you road-ready faster and with fewer surprises. This guide walks you through a practical 12-point restart process designed for Aussie camper trailers, with clear actions you can complete at home or at a storage yard before your first weekend away. Overview You will learn how to de-winterise or de-storage your camper trailer in a logical order, what to inspect on each system, when to stop and book a service, and how to pair this deep restart with a faster pre-trip routine. You will also find a scannable checklist table, packing and load tips, and FAQs that answer the most common restart questions. Key Takeaways Why a Restart Check Matters After Storage Storage protects your investment, but it does not pause wear. Rubber dries, grease settles, moisture finds seams, and small pests look for soft materials and wiring looms. A camper that looked perfect when you parked it can hide soft tyres, seized brakes, a depleted battery or a canvas leak by the time you return. A restart check is deeper than a roadside once-over. It is the bridge between long-term camper storage and trip-ready condition. Do it once at the start of the season (or after any long lay-up), then rely on a shorter routine such as a 10-minute pre-trip inspection before each departure. If you are still refining how and where you store the trailer between trips, practical layout ideas in creative camper trailer storage ideas can reduce damage risk before the next lay-up. Bringing Your Camper Out of Storage Checklist: The 12-Point Restart Work through the points in order. Fix or flag issues as you go. If a safety item fails (tyres, brakes, hitch, lights, gas), do not tow until it is rectified. 1. Full Exterior and Structural Walkaround Start unhitched, on level ground, with the handbrake on and wheels chocked if needed. Inspect the chassis rails, A-frame, drawbar, body panels, stone guard, toolboxes and fixings for rust, cracks, loose bolts, impact damage or elongated holes. Check door and hatch seals for compression set, mould or gaps. Look under edges and in corners for mud-wasp nests, rodent entry and chewed wiring. Confirm jockey wheel operation, clamp tightness and foot condition. Extend and retract stabiliser legs and confirm they lock cleanly. Sticky or bent legs are easier to deal with at home than on soft ground at camp. For ongoing care, see tips for using and maintaining stabiliser legs. Action list: 2. Tyres, Wheels and Torque Tyres are the highest-frequency failure point after storage. Sidewalls can crack, pressures drop, and flat spots can appear after months in one position. Check age and condition of all tyres including the spare. Look for cracking, bulges, uneven wear, embedded objects and damaged valves. Set pressures to the camper manufacturer’s cold recommendation for your load, then recheck after a short tow. Confirm wheel nuts are present and torqued to the correct specification, then re-torque after the first 50–100 km of the season if your service advice requires it. If the trailer sat on soft ground or soft tyres, inspect rims for corrosion at the bead. Spin each wheel (safely raised and supported) and listen for roughness that may point to bearing issues. Action list: 3. Brakes, Bearings and Handbrake Wheel ends suffer when a camper sits. Grease can settle, moisture can ingress and brake shoes can corrode to drums. With the trailer safely supported, check bearing play and noise. Service intervals vary by use and water crossings, so if you are due, book a bearing repack before the first big trip rather than after a roadside failure. Confirm electric brake function with a compatible controller, and test the breakaway system according to the unit’s design. Operate the handbrake and look for cable fray, seizure or excessive travel. Binding brakes after storage are common; a short controlled test in a quiet area helps you feel drag or pull early. For broader service timing guidance, read how often you should service an off-road camper trailer and general maintenance tips. 4. Hitch, Coupling, Chains and Safety Gear Your coupling is the connection that keeps the combination together. Inspect the hitch head, poly block or equivalent coupling, locking pins, lynch pins, safety chains, shackles and rated attachments on the A-frame. Confirm the tow vehicle receiver, tongue weight hardware and electrical socket are clean and serviceable. Practise the hook-up sequence before departure day so you are not learning under time pressure. Platinum owners can revisit how to use Platinum Campers hitches and essential hitch safety checks. Action list: 5. Lights, Plugs and Trailer Electrics Plug in the trailer connector and test indicators, brake lights, tail lights, number plate light and any clearance lamps. Wiggle the plug gently while testing to expose intermittent faults. Inspect the loom along the drawbar for chafing, poorly supported cable and corrosion in connectors. Clean contacts and apply an appropriate electrical protectant if needed. Confirm the Anderson plug path (if fitted) is clean and secure for charging on the move. A dedicated guide on Anderson plugs and 12V setups helps you verify charging behaviour after storage. 6. Battery, Charging and 12V Loads A stored camper often returns with a flat or sulphated battery, especially if it sat without a maintainer. Start here before you assume a fridge, pump or light has failed. Measure resting voltage, inspect terminals for

Read More »
Best Platinum Camper Trailers for Ford Ranger

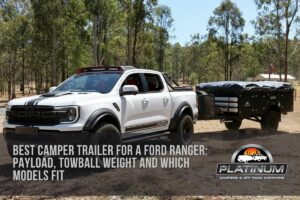
Best Camper Trailer for a Ford Ranger: Payload, Towball Weight and Which Models Fit

The best camper trailer for a Ford Ranger is the one that stays inside your Ranger’s braked towing capacity, gross combination mass (GCM), payload and tow ball mass limits once you add people, fuel, gear and water. For most Australian dual-cab Rangers, that usually means a compact to mid-size soft-floor or hard-floor camper with a sensible tare weight and controlled tow ball mass, not the heaviest hybrid you can hitch. Platinum Campers designs Australian camper trailers for real off-road use, quick setup and strong value, which makes several models a practical match for Ranger owners who want comfort without overloading the ute. This guide explains the weight rules that matter, how to check your specific Ranger, and which Platinum layouts suit couples, families and serious tracks. Overview You will learn how Ford Ranger towing really works in Australia, why payload and tow ball weight matter more than a single “tows 3.5 tonne” headline, and how to shortlist a camper trailer that fits your vehicle and trips. We cover soft-floor and hard-floor options, a model-fit comparison, packing tips, finance, warranties and FAQs so you can buy with confidence. Key Takeaways Why a Camper Trailer for a Ford Ranger Works So Well in Australia The Ford Ranger is one of Australia’s most popular tow vehicles because dual-cab 4×4 variants combine daily usability with serious braked towing ability. A well-matched camper trailer turns that ute into a weekend escape rig or a long-haul touring setup without the bulk of a large caravan. Rangers handle coastal runs, forest tracks and outback corrugations when the trailer is correctly specified. Independent suspension, a strong chassis and sensible ATM on the camper side keep the combination stable and legal. The catch is simple: many owners buy on towing capacity alone, then discover payload disappears under passengers, canopies, drawers, recovery gear and tow ball load. Choosing a camper trailer for a Ford Ranger is a weight-management decision as much as a lifestyle one. For a plain-English refresher on ATM, GTM, GVM and GCM, read Platinum Campers’ guide to camper trailer weights and towing capacity jargon. That foundation stops expensive mismatches before they start. Ford Ranger Towing Limits: What You Must Check First Start with your exact Ranger badge, year, cab style, drivetrain and any GVM upgrade. Factory ratings differ across XL, XLS, XLT, Sport, Wildtrak and other variants, and accessories change real-world payload. Critical numbers on the ute Your legal combination must respect every limit at once. If GCM is the lowest ceiling after you load the ute, your usable trailer mass may be well below the advertised towing figure. Critical numbers on the camper Platinum’s weight explainer walks through how GCM, GVM and GTM interact with family loads. Use it beside your Ranger handbook before you compare models on the Platinum Campers range. Action steps Payload and Tow Ball Weight: The Real Gatekeepers Payload and tow ball weight decide whether a camper trailer for a Ford Ranger feels safe and stays legal. Tow ball mass is not “free.” When the camper is hitched, TBM is carried by the rear of the Ranger and consumes payload that you might have reserved for kids, fridges, tools or a canopy. A family of four plus a steel canopy and drawer system can erase hundreds of kilograms before the trailer is even connected. How tow ball mass gets out of hand How to keep TBM under control If you want a compact, efficient starting point, explore small camper trailers built for easier towing and simpler storage at home. Which Platinum Campers Models Suit a Ford Ranger? There is no single “only” answer, because Rangers and trip styles differ. As a rule, lighter soft-floor and compact hard-floor campers are the easiest fit for dual-cab Rangers used by couples and families. Larger double-fold or hybrid setups need stricter weight discipline and a high-spec tow vehicle with residual payload. Below is a practical fit guide based on use case. Always verify current tare, ATM and ball mass with Platinum Campers for the exact build you order. Comparison table: Ranger use case vs Platinum direction Your Ranger use case Priority limits Strong Platinum direction Why it fits Couples, weekends, lighter SUV/ute loads Low tare, quick setup, modest TBM Chase S5 (rear fold hard floor), Cadet SE (soft floor) Compact towing footprint and efficient camp setup First family camper, value focus Balance of space and weight General S4 step-through soft floor Accessibility, storage and family-friendly layout Rough tracks, serious off-road Chassis strength, ground clearance mindset Warrior S4 Rugged soft-floor build for tougher terrain Fast setup, couples or small families Rear-fold convenience Quest E1 Rear fold hard floor for quick camp routine Maximum living space in a camper Forward-fold room Discovery E1 Larger hard-floor living area for longer stays Bigger family groups Sleeping space and layout flexibility Chariot E1 double fold More room when weights are carefully managed Extended off-grid comfort Hybrid amenities vs mass Commander Hybrid Caravan-like comfort only if Ranger payload/GCM allow Soft-floor options for Rangers Soft-floor campers stay popular with Ranger owners because canvas living areas deliver space without always pushing tare as high as large hard-wall hybrids. The Cadet SE suits entry-level and lighter combinations. The General S4 step-through layout helps families move in and out with less hassle. The Warrior S4 targets adventurers who prioritise tougher use. These models align with Australian conditions: ventilation in heat, practical kitchens and off-road oriented chassis thinking. They also tend to be easier to store on a suburban block than a full caravan. Hard-floor options for Rangers Hard-floor rear-fold and forward-fold designs appeal when you want a solid floor, faster bed routines and a more “set and forget” camp. The Chase S5 is a logical couple-focused candidate when compact towing matters. Quest E1 continues the rear-fold convenience theme. Discovery E1 pushes living space forward for families who camp longer in one spot. Chariot E1 serves larger groups when your Ranger’s residual payload and GCM still clear loaded weights with margin. Hybrid caution for Ranger owners

Read More »
Cadet SE or General S4

Cadet SE or General S4? Which Entry-Level Soft-Floor Camper Is Right for You?

Quick answer: Choose the Cadet SE if you want the lightest, most affordable way into off-road camping and you don’t mind climbing a ladder to bed. Step up to the General S4 if you want easy step-through bed access, room for more adults, and extra storage and power, and your tow vehicle can handle 2,000kg. Both are genuine off-road soft-floor campers built on the same chassis, suspension and kitchen, so this really comes down to access, space and towing weight. Here is the full breakdown so you can match the right camper to your family and your 4WD. Key Takeaways Cadet SE vs General S4: Side-by-Side Feature Cadet SE General S4 Price (from) $15,899* $17,899* Finance (from) $77/week* $86/week* Sleeps (guide) 2 adults + 4 children 4 adults + 4 children Bed access Ladder Step-through internal stairs Tare weight 1,000kg 1,100kg ATM 1,700kg 2,000kg Payload (approx.) 700kg 900kg Main tent size 5,200 x 2,100mm 5,000 x 2,800mm Power outlets 3 x 12V + 1 USB 5 x 12V + 2 USB Entertainment Bluetooth stereo Built-in entertainment system Pantry drawer No Yes Warranty 5 years structural 5 years structural *Pricing is ex Brisbane collection and excludes dealer delivery and registration. Request a quote to confirm all costs. What Both Campers Share Before the differences, it helps to know how much these two have in common, because it is a lot. Both are Australian-designed soft-floor campers engineered for full off-road use, so neither is a compromise on toughness. Each rides on dual-shock independent suspension with trailing arms and heavy-duty coil springs, a fully galvanised hammertone chassis, and 15-inch 6-stud off-road XD rims. Both use an ARK 2,000kg 50mm ball hitch with a 250kg jockey wheel, giving genuine ground clearance and departure angles for rough tracks. Inside, both deliver the same core comforts: a full stainless-steel kitchenette with a sink, servery, two drawers and a four-burner gas stove, a queen high-density memory-foam mattress, an internal privacy screen, a large fridge slide, an onboard battery with a power management system, a mesh stone guard, a plumbed drawbar tap, and a 1kg fire extinguisher. Setup takes about 7 minutes and packdown around 8 minutes on either model. In short, you are choosing between two versions of the same well-built platform, not two different classes of camper. For background on the format itself, see Platinum’s guide to the benefits of a soft-floor camper trailer. The Defining Difference: Ladder vs Step-Through The single biggest reason to choose one over the other is how you get into bed. The Cadet SE uses a ladder to reach its queen bed. It is simple, it works, and for fit adults and active kids it is a non-issue. If you are young, agile, and travelling light, the ladder saves weight and money. The General S4 uses internal step-through stairs. You walk up into the sleeping area through the camper rather than climbing an external ladder, and you can close the section off for privacy at night. This matters more than it sounds. For older campers, anyone with a sore knee or back, parents doing midnight trips for small children, or anyone who simply values comfort, step-through access is a meaningful upgrade. If bed access is the only thing you are weighing, the question is straightforward: prioritise budget and weight, pick the Cadet; prioritise easy access and comfort, pick the General. Space and Sleeping Capacity Both campers boast a huge open tent, but they are shaped differently. The Cadet’s main tent measures 5,200 x 2,100mm, while the General’s is 5,000 x 2,800mm. The General trades a little length for a lot more width, giving it roughly 14 square metres of tent floor versus the Cadet’s 10.9, about 28% more living space. That extra width is why the sleeping guide differs. The Cadet SE is rated for 2 adults and 4 children, ideal for a couple with kids. The General S4 steps up to 4 adults and 4 children, making it the better pick for larger families, two couples travelling together, or anyone who wants room to spread out on longer trips. Both models offer an optional kids’ room to extend capacity further, so neither locks you in. But if you already know you need to sleep more adults, the General is built for it. Storage and Power Storage is generous on both, thanks to compartmentalised boxes, three full-length 1,700mm pole tubes, and a large fridge slide. The Cadet SE was upgraded from the older Cadet S2 with enclosed sides and seven dedicated storage compartments, so it punches above its price on organisation. The General S4 goes further, marketed as having “more storage than Storage King,” and adds a pantry drawer above the kitchen for cooking supplies and cutlery. Its higher payload also means you can legally carry more gear, which matters on extended trips. Power tells a similar story. The Cadet SE runs 3 x 12V sockets and 1 USB, while the General S4 doubles up with 5 x 12V sockets, 2 USB ports, and a built-in entertainment system. Families running fridges, lights, fans and devices will appreciate the General’s extra capacity. Weight and Towing: This May Decide It Weight is where your tow vehicle gets a vote. Understanding two numbers makes this easy. Tare is the empty weight of the camper. ATM (Aggregate Trailer Mass) is the most it can legally weigh fully loaded. The gap between them is your usable payload. The Cadet SE has a tare of 1,000kg and an ATM of 1,700kg, leaving around 700kg of payload. The General S4 has a tare of 1,100kg and an ATM of 2,000kg, for roughly 900kg of payload. That 300kg ATM difference is significant. A 1,700kg Cadet sits comfortably within the braked towing limit of many mid-size SUVs, giving you towing headroom. A 2,000kg General sits right at the limit of a 2,000kg-rated vehicle, so it leans toward a larger SUV or 4WD with capacity to spare. Both campers exceed 750kg, so they must be towed with a braked setup.

Read More »
Platinum Camper Trailers for Grey Nomads

Platinum Camper Trailers for Grey Nomads

The best Platinum camper trailers for grey nomads are the Commander Hybrid and the Discovery E1, with the General S4 a strong value pick for couples who want easy access and quick setup. These models combine off-grid capability, comfortable living space, and manageable towing weights, the three things that matter most when you are travelling for months at a time. Grey nomads, retired or semi-retired Australians aged 50 and over who tour the country for extended periods, are one of the most committed groups on the road. Older Australians travelling domestically in self-sufficient recreational vehicles for extended periods have been referred to as grey nomads for more than two decades, with the term applying to those who tour for a minimum of three months. Choosing the right rig is the difference between a relaxed Big Lap and a trip cut short by setup hassle or a poorly matched tow vehicle. This guide breaks down which Platinum models suit the grey nomad lifestyle, what to look for in setup and power systems, and how to match a camper to your vehicle legally and safely. Key Takeaways What Makes a Camper Trailer Right for Grey Nomads? The right camper trailer for grey nomads prioritises easy setup, off-grid self-sufficiency, comfortable sleeping and seating, and a towing weight your vehicle can handle for thousands of kilometres. Comfort and reliability outrank raw size, because most grey nomads travel as couples and cover long distances at an unhurried pace. Extended travel is the defining feature of this lifestyle. Retirees travel for longer and spend more nights per trip than any other group, sustaining regional tourism outside peak holiday periods. A camper that is quick to pitch and pack means less physical strain at the end of a long driving day, which becomes more important the longer you stay on the road. What’s Up Downunder Self-sufficiency is the second priority. Many grey nomads prefer free camping and roadside stops over paid parks, so a camper needs onboard water, solid battery storage, and a kitchen that works anywhere. If you are weighing your options, our guide to whether camper trailers are still worth it covers the value case in detail. The market backs this up. By 2021, more than 750,000 recreational vehicles were registered in Australia, and tourism data showed 11.8 million domestic camping and caravanning trips in a single year, with 29% of those taken by people aged 55 and over. According to the Caravan Industry Association of Australia, this segment remains a backbone of regional travel. Best Platinum Camper Trailers for Grey Nomads The standout choices are the Commander Hybrid for off-grid comfort, the Discovery E1 for living space, and the General S4 for accessible, affordable touring. Each suits a slightly different travel style and budget. The Commander Hybrid blends the comfort of a caravan with the agility of a camper trailer, making it the premium pick for grey nomads planning long off-grid stints. It offers hard-sided protection, a permanent bed, and the storage capacity needed for weeks between resupply. See the Commander Hybrid for full specifications, and read how a hybrid camper trailer lifts the touring experience. The Discovery E1 is a forward-fold hard floor camper that maximises living space and comfort. Its generous internal area and quick setup make it ideal for couples who want room to spread out without stepping up to a full caravan. View the Discovery E1 to compare layouts. The General S4 is a step-through soft floor camper built around accessibility and storage. The step-through design reduces the bending and climbing that can be a real consideration for older travellers, and it sits at a friendlier price point. Explore the General S4 for details. For couples who value the fastest possible setup, the rear-fold Chase S5 is purpose-built for compact towing and quick camps, a strong fit for those who relocate often. Our breakdown of the best camper for couples puts these options side by side. Model Type Best for grey nomads Setup Why it suits the lifestyle Commander Hybrid Hybrid Extended off-grid travel Fast Caravan comfort, off-road agility, big storage Discovery E1 Forward fold hard floor Couples wanting living space Quick Maximum internal comfort, family-friendly General S4 Step-through soft floor Easy access, value Moderate Step-through entry, strong storage, affordable Chase S5 Rear fold hard floor Frequent movers Very fast Compact towing, rapid setup Cadet SE Soft floor Lightweight budget touring Moderate Light, affordable entry point Easy Setup and Low-Maintenance Living For grey nomads, a camper that sets up in minutes and needs little upkeep is worth more than extra square metres. Hard floor and hybrid designs pitch faster than traditional soft floor campers, which reduces fatigue on travel-heavy days. Platinum’s rear-fold and forward-fold models are engineered for speed, with the bed and main living area deploying as the camper opens. If setup time is your deciding factor, see which is the quickest to set up across the range. Low maintenance keeps you on the road instead of in a workshop. Regular servicing of bearings, brakes, and suspension is essential when you are covering tens of thousands of kilometres. Our guide on how often to service your camper sets out a sensible schedule for long-distance travel. Australian build quality matters here too. Platinum campers use a hot-dipped galvanised chassis, meaning the frame is coated in zinc to resist rust, and independent suspension, where each wheel moves separately for a smoother ride on rough roads. These features extend the camper’s working life across corrugated outback tracks. Off-Grid Power for Extended Free Camping Reliable off-grid power is non-negotiable for grey nomads who free camp, and the proven setup is solar panels paired with a lithium battery and a DC-DC charger. This combination keeps fridges, lights, and devices running for days without mains power. Solar is the primary source. A well-sized solar array recharges your batteries during daylight, and our overview of solar power explains how to match panel capacity to your usage. Storage is the other half. Lithium batteries hold more

Read More »
0
    0
    Your Cart
    Your cart is empty