A camper trailer handover checklist is the structured walkthrough you complete on delivery day so every safety system, fitting, weight rating and warranty document is verified before you leave the yard. Treat collection as a formal inspection, not a quick handshake, and you reduce the risk of discovering faults, missing accessories or incomplete paperwork on the first trip.
Australian conditions punish shortcuts. Corrugations, heat, coastal salt and remote travel mean small issues at handover can become expensive problems later. This guide walks you through 15 practical checks covering structure, towing gear, electrics, gas, water, setup and documentation, so you take delivery with confidence.
Overview
You will learn how to run a full dealer walkthrough, what to test on the spot, which documents to collect, and how handover checks differ from a later pre-purchase inspection or a routine trip safety check. The same process applies whether you are collecting a soft floor, hard floor, hybrid or double-fold model from the camper trailer range.
Key takeaways
- Complete the full camper trailer handover checklist before signing final acceptance and leaving the premises.
- Verify compliance plate data, hitch, brakes, lights, tyres, water, gas and 12V systems while staff can still fix issues.
- Insist on a live setup demonstration for canvas, annexes, awnings and fold systems.
- Collect warranty certificates, manuals, gas certification, keys, spare parts lists and finance or registration paperwork.
- Photograph the unit, note any defects in writing, and confirm insurance cover before the first tow.
- Use handover notes as the baseline for future servicing and warranty claims.
Why a Camper Trailer Handover Checklist Matters
Delivery day is the last easy chance to resolve defects with the seller present. Once you drive away, scheduling returns, proving a fault existed at collection, and sorting missing inclusions becomes slower and more stressful.
A thorough handover also protects legal and insurance positions. Registration, roadworthiness, warranty start dates and insurer records all rely on accurate delivery details. If ball weight, ATM or brake function was never confirmed against your tow vehicle, the first highway merge is the wrong time to find out.
Handover is different from buying research. Model comparisons and buyer questions happen earlier. Handover confirms the exact unit in front of you matches the order, options list and advertised specification.
How to Use This Handover Checklist on Delivery Day
Block enough time. A proper walkthrough for a fully optioned off-road camper often takes 60 to 90 minutes, longer if you erect the full tent and annex.
Bring a printed or phone checklist, a torch, a notepad, a torque reference for wheel nuts if you have one, and your tow vehicle with a working trailer plug and brake controller where fitted. Wear clothes you can crawl under the drawbar in.
Work in order: documents and identity of the trailer first, then structure and towing safety, then living systems, then a full setup demo, then final sign-off. Do not skip wet-weather or night-time items just because the yard is busy; ask staff to demonstrate anything you cannot test yourself.
Camper Trailer Handover Checklist: The 15 Essential Checks
1. Confirm identity, compliance plate and weight ratings
Start at the compliance plate and VIN or trailer serial details. Match them to the sales contract, invoice and any registration documents.
Record tare, ATM, GTM and tow ball mass. Confirm those figures still suit your vehicle using correct towing capacity terms, not brochure estimates alone. If you upgraded wheels, batteries, freestanding annexes or rear bars after ordering, ask whether plated ratings and payload still reflect the as-delivered build.
Photograph the plate. Payload mistakes are one of the fastest ways to create an unsafe combination on day one.
2. Inspect chassis, drawbar, body and structure
Walk the full chassis line. Check welds, paint or coating integrity, stone damage from transport, and mounting points for the jockey wheel, spare wheel and bumper.
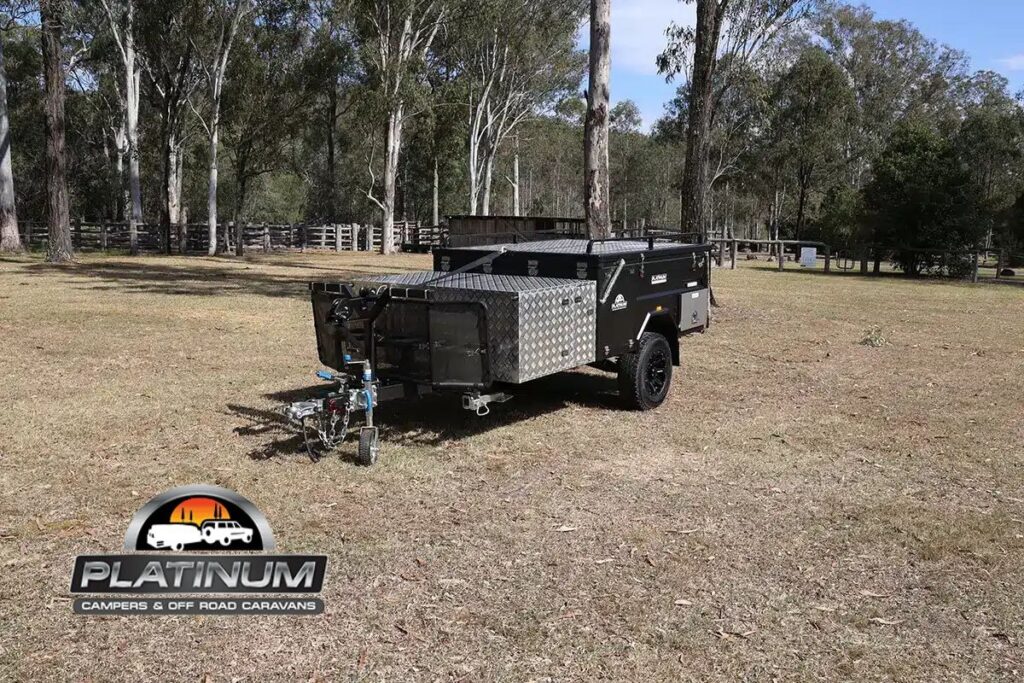
Inspect the drawbar for straightness, hitch mount security and any transport straps or temporary fittings still attached. On hard floor and hybrid bodies, check door alignment, seals and panel gaps. On soft floor models, confirm the tub, tailgate and hinge hardware operate smoothly without binding.
Structural quality underpins the 5 year structural warranty many Australian builders promote, so note chips, rust bloom or misalignment in writing before acceptance.
3. Hitch, coupling, safety chains and handbrake
Have staff demonstrate coupling and uncoupling on your vehicle. Confirm hitch type, pin or latch operation, grease points and lock hardware.
Check safety chains for length, rating marks and secure attachment. Operate the handbrake and confirm it holds on a mild slope in the yard if safe to do so. Review hitch safety checks while the unit is still on site, and ask for a refresher on hitch operation if the coupling is new to you.
Never leave until you can hitch and unhitch without guesswork.
4. Brakes, breakaway system and brake controller pairing
Confirm electric brake function with your in-car controller. Watch both sides of the trailer respond during a controlled yard test with staff guidance.
Inspect the breakaway switch, cable routing and lanyard attachment point. Ask how the breakaway battery is charged and how to test it. Confirm brake adjustment method and the recommended first service interval for shoes or pads after bedding-in.
If the controller does not communicate cleanly, resolve wiring or plug faults before departure.
5. Lights, trailer plug and cable condition
Test indicators, brake lights, tail lights, number plate light and any clearance or reverse lights. Wiggle the plug gently while lights are on to expose intermittent faults.
Inspect the trailer cable for pin damage, corrosion and secure grommets. Confirm plug type matches your vehicle and that any Anderson plug for charging is correctly wired and fused.
Lighting defects are an immediate roadworthy issue and easy to fix at the yard.
6. Wheels, tyres, spare and wheel nuts
Check tyre size, load rating and speed rating against the plate and handbook. Inspect sidewalls for transport damage and confirm matching tyres all round, including the spare.
Ask what wheel nut torque is specified and whether nuts were torqued after any transport movement. Confirm jacking points and whether a suitable jack and wheel brace are included or need to be supplied by you.
Schedule a re-torque after the first short drive as part of normal practice, and keep that habit in your ongoing maintenance routine.
7. Suspension, bearings and underbody protection
Visually inspect independent suspension arms, bushes, bump stops and shocks for leaks or loose hardware. Look along brake lines, electrical conduit and tank straps.
Ask what bearing maintenance interval applies and whether destinations such as beach work need shorter service cycles. Confirm any stone guard, checker plate or coating coverage matches the options you paid for.
Underbody issues are harder to spot later when the trailer is packed and muddy.
8. Jockey wheel, stabiliser legs and levelling gear
Wind the jockey wheel through its full range. Confirm the clamp grips securely and the wheel clears the coupling path when stowed for travel.
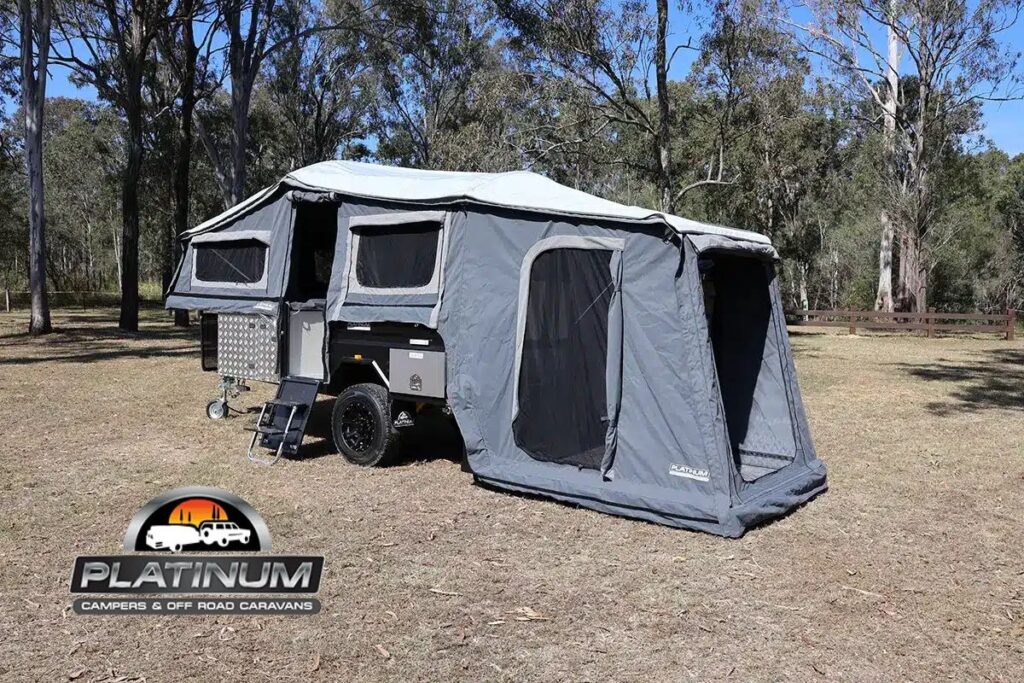
Extend and retract each stabiliser leg. Check foot plates, pins and mount bolts. Ask for the correct order of operation so you do not stress the chassis when setting up on uneven ground.
These parts take daily abuse; stiff or bent gear should be replaced at handover, not after the first remote camp.
9. Water tanks, plumbing, tapware and pump
Inspect tank mounts, filler necks, breathers and drain taps. If water is already in the system, run the pump and check for leaks at joins, tapware and the hot-water service if fitted.
Confirm tank capacity matches the order and that any dual-tank switching works. Ask how to winterise or sanitise the system and where the inline filter sits if one is installed.
A dry leak test with staff is acceptable when tanks are empty, but do not skip a pressure or pump demonstration.
10. Gas system, certification and appliance function
Check gas bottle mounts, restraint straps and the connection type fitted to the camper. Newer Australian leisure systems increasingly use LCC27 connections on appliances, so confirm bottle compatibility and that certification labels are present.
Have staff light the cooktop and any other gas appliance. Inspect hoses for date markings, kinks and secure routing away from heat and chassis pinch points.
Do not accept missing gas certificates or unlabelled modifications.
11. 12V system, battery, solar and charging
Power on the battery management or distribution panel. Verify battery type, capacity and secure isolation. Test lights, USB points, outlets, water pump switch, fridge circuit and any display screens.
If solar, DC-DC charging or an Anderson input is fitted, confirm charge current with the vehicle running when practical. Clarify how to monitor state of charge and what fuse layout applies. A solid grasp of the 12V system at handover prevents flat-battery surprises on trip one.
Photograph the fuse panel and label any unmarked switches.
12. Full canvas, tent or hard-floor living setup
This is non-negotiable. Erect the main sleeping area, poles, draught skirt, annex walls and awning as you would at camp. On rear fold, forward fold and double fold designs, run the complete open and pack-down sequence.
Check zippers, buckles, pole ends, rope tracks, windows, doors and mattress condition. Confirm the pack-away fit is clean and that nothing rubs through canvas in the travel position. Ask about the canvas warranty period and care products approved by the manufacturer.
If staff only “talk through” setup, request a real demonstration. First-time owners especially need muscle memory before dark arrival at a bush site.
13. Kitchen, fridge slide, storage furniture and fittings
Operate the kitchen slide or fold-out bench. Test hinges, latches, gas strut assists and lock pins. Check sink drainage, chopping board fittings and utensil storage.
Open every hatch, drawer and cupboard. Confirm soft-close or travel locks hold under vibration by pushing and pulling firmly. Inspect bed bases, table legs and seating mounts for secure fasteners.
Missing end caps, weak latches or misaligned slides are cheap to fix now and irritating later.
14. Accessories, spares, keys and inclusions list
Tick every option on the sales paperwork: spare wheel, jerry can holders, recovery points, annex roof, shower tent, bike racks, rear storage pods, tool kit and fire extinguisher if included.
Collect all keys, barrel locks and remote fobs. Ask for spare circlips, tent pegs, guy ropes and any model-specific travel boots or covers. Confirm where the winch handle, corner steadies brace and pump spares live.
If an accessory was back-ordered, get the commitment in writing with a supply date.
15. Paperwork, warranties, finance and insurance readiness
Do not drive away on verbal assurances. Collect:
- Signed contract and final invoice with options list
- Compliance and identity details matching the trailer
- Warranty documents covering structure, canvas and components
- Owner manuals and setup guides
- Gas certification and any electrical certificates
- Service schedule and first service due date
- Keys and accessory inventory
- Registration or transfer documents as applicable in your state
- Finance finalisation papers if you used a finance plan
Confirm warranty start date, exclusions and the claims process. Arrange or activate cover using practical camper insurance steps before the first highway stage. Photograph the odometer or hub meter if fitted, and the general condition of the exterior.
Handover Checklist Summary Table
| Check area | What “pass” looks like | Action if it fails |
| Identity and weights | Plate matches contract; ATM/GTM/TBM suit tow vehicle | Stop delivery until paperwork or build is corrected |
| Structure | No damage, sound mounts, aligned body hardware | Written defect list and repair before acceptance |
| Hitch and chains | Smooth couple/uncouple; rated chains secured | Adjust, replace or retrain before leaving |
| Brakes and breakaway | Controller response both sides; lanyard correct | Diagnose wiring or adjustment on site |
| Lights and plug | All lamps work; cable undamaged | Repair pins, lamps or earths immediately |
| Tyres and nuts | Correct ratings; spare present; torque confirmed | Replace damaged tyres; torque and recheck |
| Suspension and underbody | No leaks; lines protected; hardware tight | Rectify before first corrugated road |
| Jockey and legs | Full travel; secure clamps; stable feet | Replace bent or binding gear |
| Water system | No leaks; pump primes; drains operate | Reseal or re-plumb at dealer |
| Gas system | Certified; appliances light; hoses sound | Do not use until certified and safe |
| 12V and charging | Loads work; charging proven; fuses labelled | Fix faults; document battery age and type |
| Living setup | Full erect and pack-down completed by you | Repeat demo; repair canvas or poles now |
| Kitchen and storage | Slides lock; hatches seal; furniture solid | Adjust latches and fasteners on site |
| Inclusions | Options and spares match invoice | Written back-order or immediate supply |
| Documents and cover | Warranties, manuals, rego/finance, insurance | No departure until pack is complete |
Soft Floor, Hard Floor and Hybrid: What Changes at Handover
Soft floor campers need extra time on canvas tension, pole packing and vinyl floor condition. Confirm mud walls and annex joins are complete and labelled.
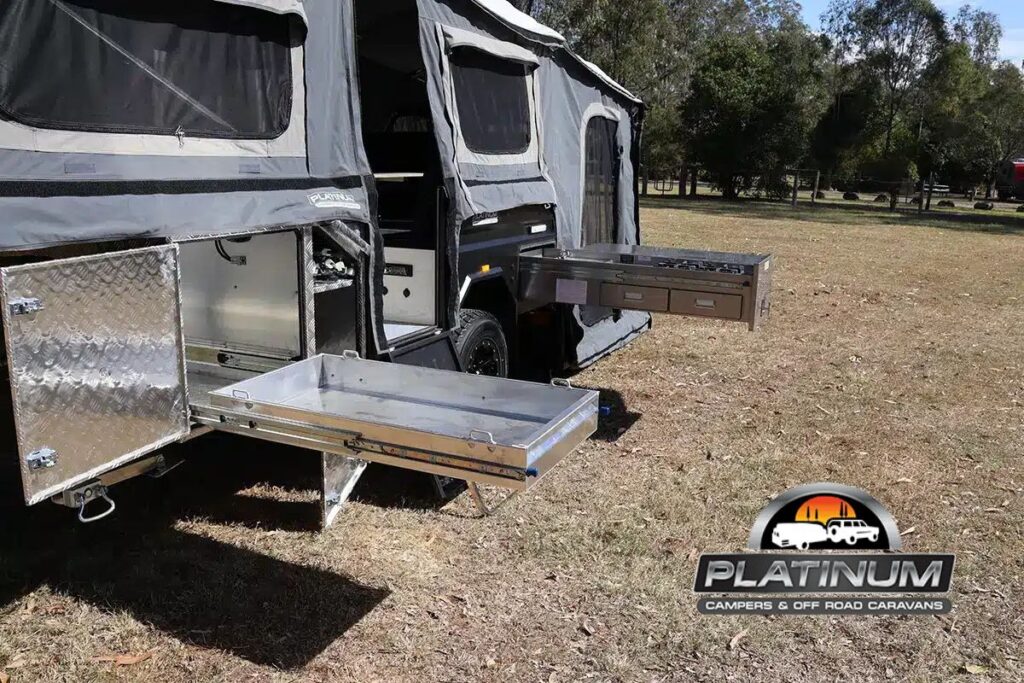
Hard floor and rear-fold units need careful checks of fold hinges, gas struts, roof seals and internal cabin latches. Walk the sealed living zone for light gaps and water ingress points.
Hybrids add caravan-like systems: more complex 12V, larger fridges, possible hot water and denser cabin joinery. Allow longer for electrical and appliance demos, and confirm which faults fall under component versus structural warranty.
Whatever the layout, match the trailer to your vehicle using a proper tow vehicle assessment before you accept a heavier optioned build than you planned.
After You Leave the Yard: First 48 Hours
Complete a short shakedown drive, then re-check wheel nuts, lights, handbrake and hatch locks. Pack using sensible load secure habits so ball mass and cargo balance stay inside safe limits.
Do a practice setup at home or a nearby park before any remote trip. Note pack-down times, missing pegs and switch locations while spare parts are still easy to source.
Diary the first service. Early bearing, brake and hinge inspections catch bedding-in wear while warranty pathways are clear. Keep handover photos and the signed defect sheet with the owner file.
Common Handover Mistakes to Avoid
- Signing acceptance while the trailer is still partly wrapped or not fully assembled.
- Skipping the full tent and annex demonstration to “save time.”
- Ignoring ball weight because the vehicle’s braked towing figure “looks high enough.”
- Leaving without gas certificates, spare keys or a written options list.
- Assuming insurance automatically started when finance settled.
- Failing to record cosmetic damage that transport or yard handling caused.
A calm, methodical camper trailer handover checklist prevents each of these.
Frequently Asked Questions
What is a camper trailer handover checklist?
It is a delivery-day inspection list covering identity plates, structure, hitch, brakes, lights, tyres, water, gas, 12V, living setup, inclusions and warranty paperwork. You complete it with the dealer before final acceptance so faults and missing items are fixed before you tow away.
How long should a camper trailer handover take?
Plan for at least 60 to 90 minutes for a standard off-road camper, and longer if you erect annexes or verify complex electrical packs. Rushing the walkthrough is the main reason owners discover faults on the first weekend away.
What documents should I receive at camper trailer delivery?
Collect the final invoice and options list, compliance details, warranty certificates, manuals, gas certification, service schedule, keys and any registration or finance papers. Keep digital photos of the compliance plate and signed defect notes with those files.
Should I insure the camper before I collect it?
Yes. Cover should be active before the trailer moves under your control, including the drive home from the dealer. Confirm the serial details, accessories list and agreed value match the unit you are collecting.
Do I need a full setup demonstration if I have owned campers before?
Yes. Every model packs differently. Hinge sequences, pole numbering, travel covers and latch positions vary, and handover is the best time to learn the exact unit you bought with staff support.
What warranty items should I confirm at handover?
Confirm structural, canvas and component warranty lengths, start dates, exclusions and claim contacts in writing. Platinum Campers references a 5 year structural warranty, 2 year canvas warranty and 12 month component warranty on applicable products, so match the paperwork to your build.
What if something fails during the handover inspection?
Stop and list the fault in writing. Agree repair, replacement or a timed rectification plan before you sign final acceptance. Do not accept vague promises without dates and responsible contacts.
Can I use the same checklist for used or ex-demo campers?
Yes, with extra emphasis on wear items: bearings, brakes, canvas condition, water leaks, battery health and service history. Used units also need careful verification that inclusions listed on the sale sheet are still present.
Is handover the same as a pre-purchase inspection?
No. Pre-purchase checks help you decide whether to buy. Handover verifies the specific delivered trailer, options and documents after sale, immediately before you take ownership on the road.
What should I test with my own tow vehicle on the day?
Hitch fitment, plug compatibility, electric brake controller pairing, light function and a realistic sense of ball mass and rear sag. If the combination feels wrong in the yard, resolve it before highway speeds.
Collect With Confidence, Then Go Camping
A disciplined camper trailer handover checklist turns delivery day into a controlled quality gate rather than a blur of excitement. Work through structure, towing safety, living systems and paperwork in order, record anything outstanding, and only then hitch up for the trip home.
When you are ready to inspect a new build, talk to the team via contact details and book a delivery walkthrough that gives you time to complete every item above. Explore the range, confirm your tow combination, and leave the yard knowing your next Australian adventure starts on solid ground.